Over time, the grout lines between tiles and stone installations can become cracked, porous, or simply worn down from years of use, exposure to moisture, and normal expansion/contraction processes.
Learning proper repairing grout techniques keeps these vulnerable areas sealed while restoring the aesthetic uniform appearance of quality tile installations.
How to Repair Cracked Grout Step-by-Step
Repairing cracked or damaged grout is important for restoring watertight seals and preventing further deterioration in tile installations. Follow this professional step-by-step process:
- Clean and Remove Loose Grout – Use a grout saw or Dremel tool to rake out cracked areas wider than 1/8 inch down to sound grout. Clean debris and dust.
- Wash Tiles and Joints – Mix an alkaline tile cleaner with water and scrub joints to remove oils, grease and limiting finish coatings. Thoroughly rinse.
- Dry the Surface – Allow 24 hours drying time for moisture-sensitive new grout. Aim for tile/joint moisture content under 4%.
- Apply Grout Release – Brush or roll a thin grout release coating onto the edges of existing tiles. This allows new grout to bond only inside the joints.
- Mix and Apply New Grout – Prepare an appropriate premixed grout. Holding a rubber grout float at a 45° angle, firmly pack joints completely full, ensuring no gaps or pinholes.
- Clean Excess Grout – Once grout firms up slightly, use a damp sponge in a circular motion to smooth joints and remove surface film. Rinse sponge frequently.
- Final Clean-Up – Once grout is fully hardened, use a soft, dry cloth to polish off any remaining haze from tile faces without disrupting filled joints.

Repairing Methods
- Raking Out – Using a carbide-tipped grout saw or rotary tool to remove loose, cracked grout down to sound material. Clean out to at least 1/8 inch depth.
- Surface Cleaning – Thoroughly wash affected areas with alkaline tile cleaners prior to regrouting. Removes limiting sealers, grease, dirt.
- Joint Pretreatment – Wipe on thin grout release/barrier coating on tile edges. Allows clean separation when curing.
- Manual Re-Grouting – Hold grout float at 45° angle, firmly pressing/packing replacement grout into raked joints. Take precautions not to smear tiles.
- Mechanical Re-grouting – Specialized grout bag systems allow easier, faster joint filling and less mess/waste versus manual application.
- Chemical Grouts – Products like epoxy or urethane injection grouts have very low shrinkage. Good for hairline crack repairs.
- Tube Caulking – All-in-one caulk style grout repair options useful to fill minor scratches and cracks up to 1/8 inch.
- Post-Cleaning – Wipe a damp sponge circularly across tiles to shape joints and remove surface film. Rinse sponge frequently.
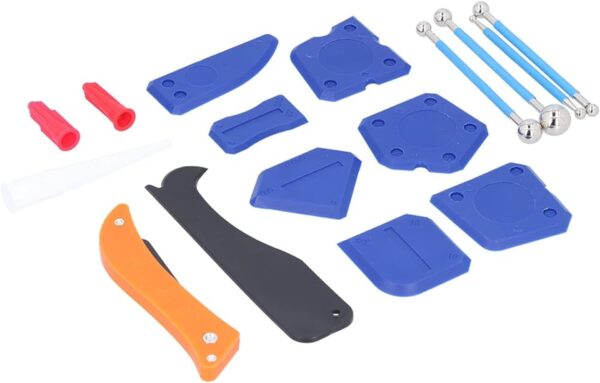
Grout Repairing Tools
Here are some of the most useful tools for grout repair and regrouting:
- Grout Rakes – Carbide-tipped hand tools that allow raking out old cracked grout effectively. Available in different sizes.
- Rotary Tools – Small grinding or cutting discs for Dremels efficiently remove failing grout from joints. Control speed carefully.
- Grout Floats – Rubber trowel-like floats, usually 4-6 inches wide, for working replacement grout into gaps and holes.
- Grout Bags – Special bags with pliable rubber nozzles allow quick filling of grout lines without mess or waste.
- Sponges – Damp grout sponges help shape joints, smooth grout, and remove excess film during finessing. Rinse often.
- Buckets – Useful for mixing repair grout batches and holding rinse water for sponge cleaning methods.
- Mixing Paddles – Needed to thoroughly blend pre-mixed grout repair products to proper consistency before placing.
- Grout Sealant – Protects porous grout repairs from new staining or moisture absorption after installation.
- Grout Removal Tools – Special saws, grinding disks, or manual chisels help cut out hard, refractory grout.

Fixing Grout in Showers
Regularly re-sealing shower grout protects against moisture damage. Replace missing or cracked grout to prevent leaks causing underlying water damage.
Repairing Grout Between Tiles
Rake out old grout 1/4 inch deep and clean thoroughly before regrouting between tiles.
Ensure joints have not widened from substrate movement before re-grouting.
Best Grout Repair Products
Here are some of the top-rated grout repair products to consider for both DIY and professional jobs:
- Polyblend Non-Sanded Grout – An extremely versatile polymer-modified grout for renovations. Resists micro-cracking and has non-slump properties for vertical/overhead application. Available in over 35 colors.
- GE Silicone II Caulk – A prime caulk option useful for filling minor scratches and gaps up to 1/8″ wide. Strong adhesion to common building materials and bathroom environments.
- Mapei Premixed Grout – Ultracolor Plus FA grout offers anti-microbial product protection. Requires only addition of water onsite. Rapid-setting formula.
- Laticrete SpectraLOCK Pro Premium Grout – High performance epoxy grout with superb stain resistance. Easy to use liquid component ratios. Fully chemically cures for durability.
- Custom Building Products Polyblend Caulk – Specifically designed to match Polyblend grout colors. Excellent for gaps smaller than 1/8 inch. Water clean-up.
- TEC Skill Set Pre-Mixed Grout – Economical acrylic latex formulation needing only water. Resists mold/mildew. Can be used for both floor and wall repairs.
Look for grout repair products offering maximum adhesion, shrink and crack resistance, custom coloring, and durability in expected service conditions.
Conclusion
Learning proper repair techniques for cracked or failing grout keeps tilework lasting longer.
Restore grout lines early before moisture issues arise. With the right methods and materials, contractors can efficiently renew deteriorated grout joints.
By following the methods and best practices for grout repair, contractors can efficiently restore the integrity and visual appeal of damaged tile grout lines across residential, commercial sites.
