The Charpy v-notch test remains an important quality assurance assessment quantifying a material’s resistance to sudden fracture from impacts.
Charpy impact test procedures, results analysis, and key advantages of this method versus alternatives like the Izod impact test.
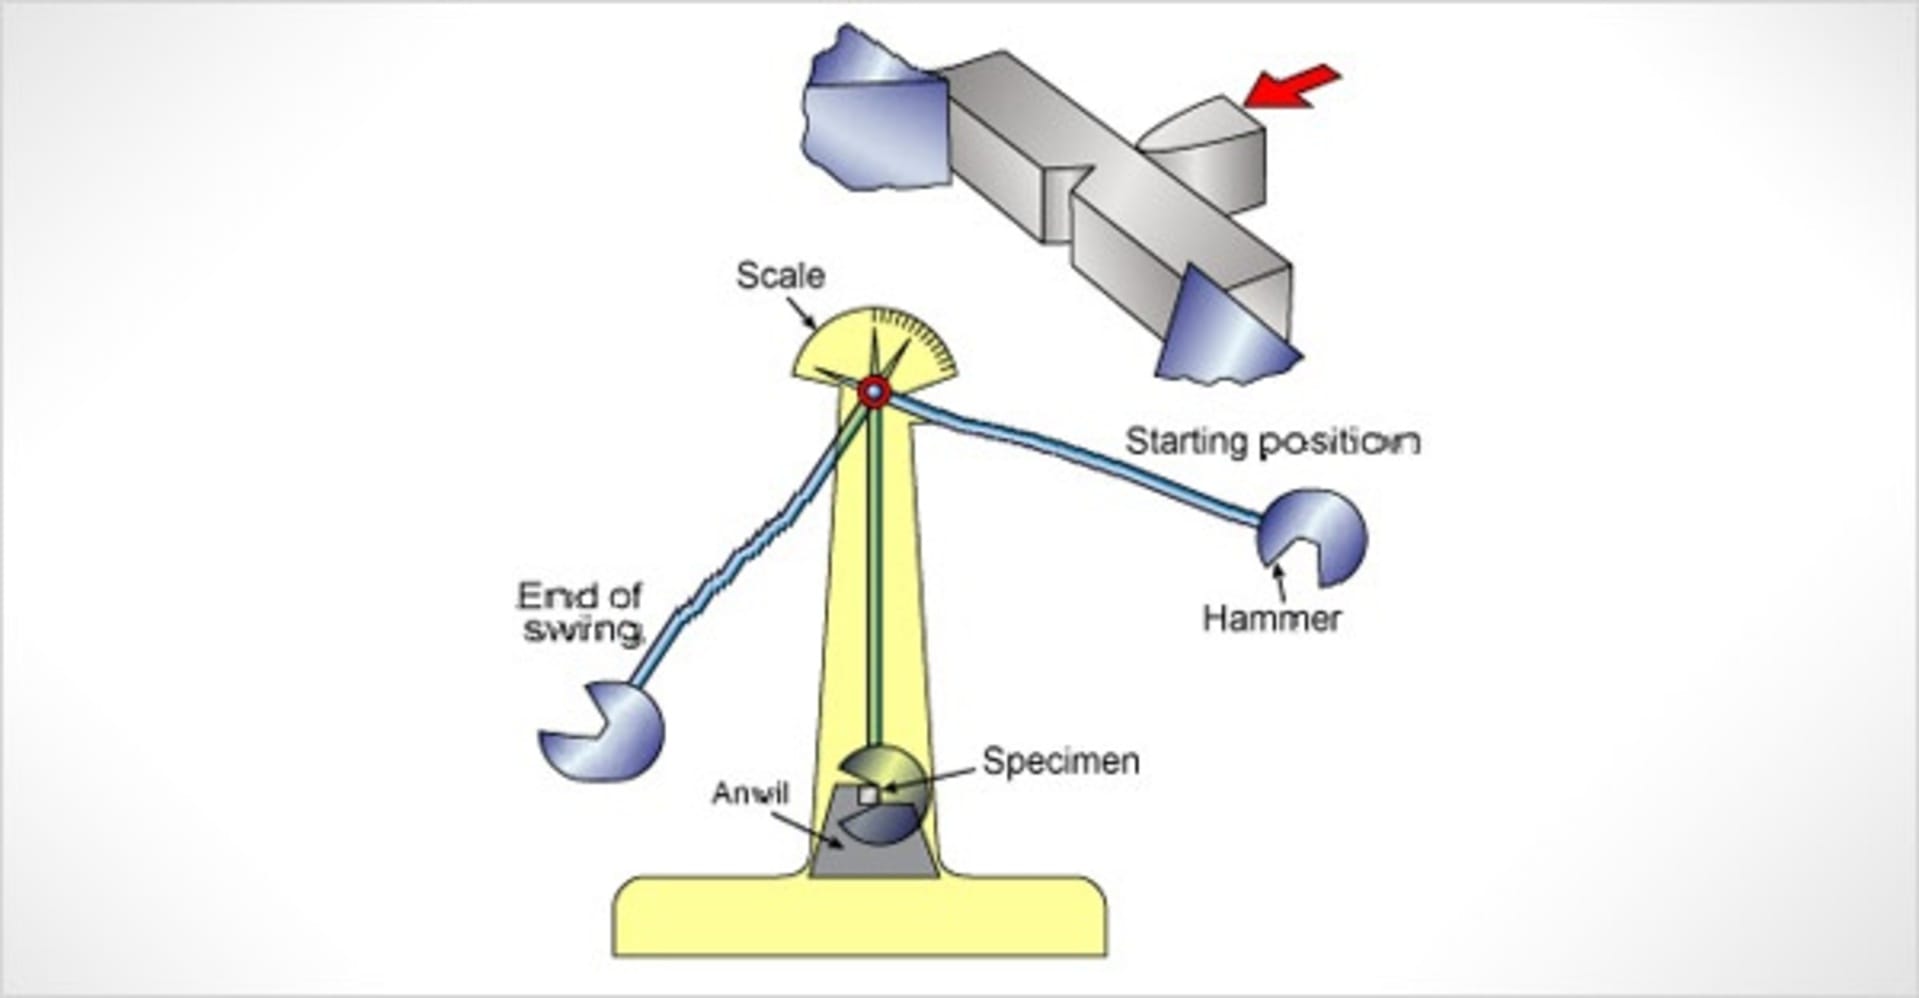
The standardized test measures the energy absorbed fracturing a notched specimen using a pendulum hammer. Higher absorbed energy indicates greater ductility and toughness. This guides materials selection and quality control across industries from metals manufacturing to composites and polymers.
Overview of Standard Procedures for Charpy Impact Testing
ASTM A370 outlines the standard Charpy test preparation and procedures including:
- 10mm x 10mm x 55mm beam sample with 45° V-notch 2mm deep with 0.25mm radius
- Striker with a specific weight attached to a pendulum lever arm dropping to fracture the sample
- Measuring the energy absorbed from the pendulum swing height differences before and after fracture
- 2°C temperature standard with option to test at other controlled temperatures
- Defining material toughness as the energy absorbed per cross-sectional square cm
Precise test control minimizes experimental variability when determining the ductile to brittle transition temperature behavior.
Key Advantages of Using the Charpy V Notch Test Method
Charpy tests quantify fracture resistance from sudden impacts, complementing tension testing. Benefits over Izod impact testing include:
- Tests rectangular sections for easier molding of thermoplastic composites
- Notch geometry concentrates stress for more controlled ruptures
- Direct access to both sample faces for temperature conditioning
- Test adaptable sample sizes unlike fixed Izod configurations
This makes Charpy the preferred test assessing material suitability for applications facing impulse loading.
Equipment Specifications and Setup
The critical apparatus components include an weighted pendulum hammer on frictionless bearings swinging to strike mid-span samples.
Common specimens get mounted on an anvil with clearance slots to avoid double hits. Precisely aligning the hammer, anvils, and mounting hardware ensures efficient energy transfer into test pieces.
Detailed specifications provide standaridized comparitive metrics. Sample notches require particular attention to adhere to dimensions influencing crack propagation. Deviations contribute to result variations.
Contrasting Charpy and Izod Test Methods
The Izod test also measures impact resistance with key differences:
- Izod uses cantilever clamped samples compared to Charpy’s anvil mounts
- Fixed Izod specimen dimensions differ from adjustable Charpy sizes
- Izod hammer strikes the notched side rather than opposing side
So for thermoplastics where notched side access proves difficult, Charpy tests work better assessing ductility.
Calculating Fracture Toughness from Charpy V-notch Results
With known sample dimensions and test temperature charpy energy values convert into critical stress intensity factors defining inherent material fracture toughness through ASTM E399.
However, trained technicians appropriately interpret results as many variables influence the calculation.
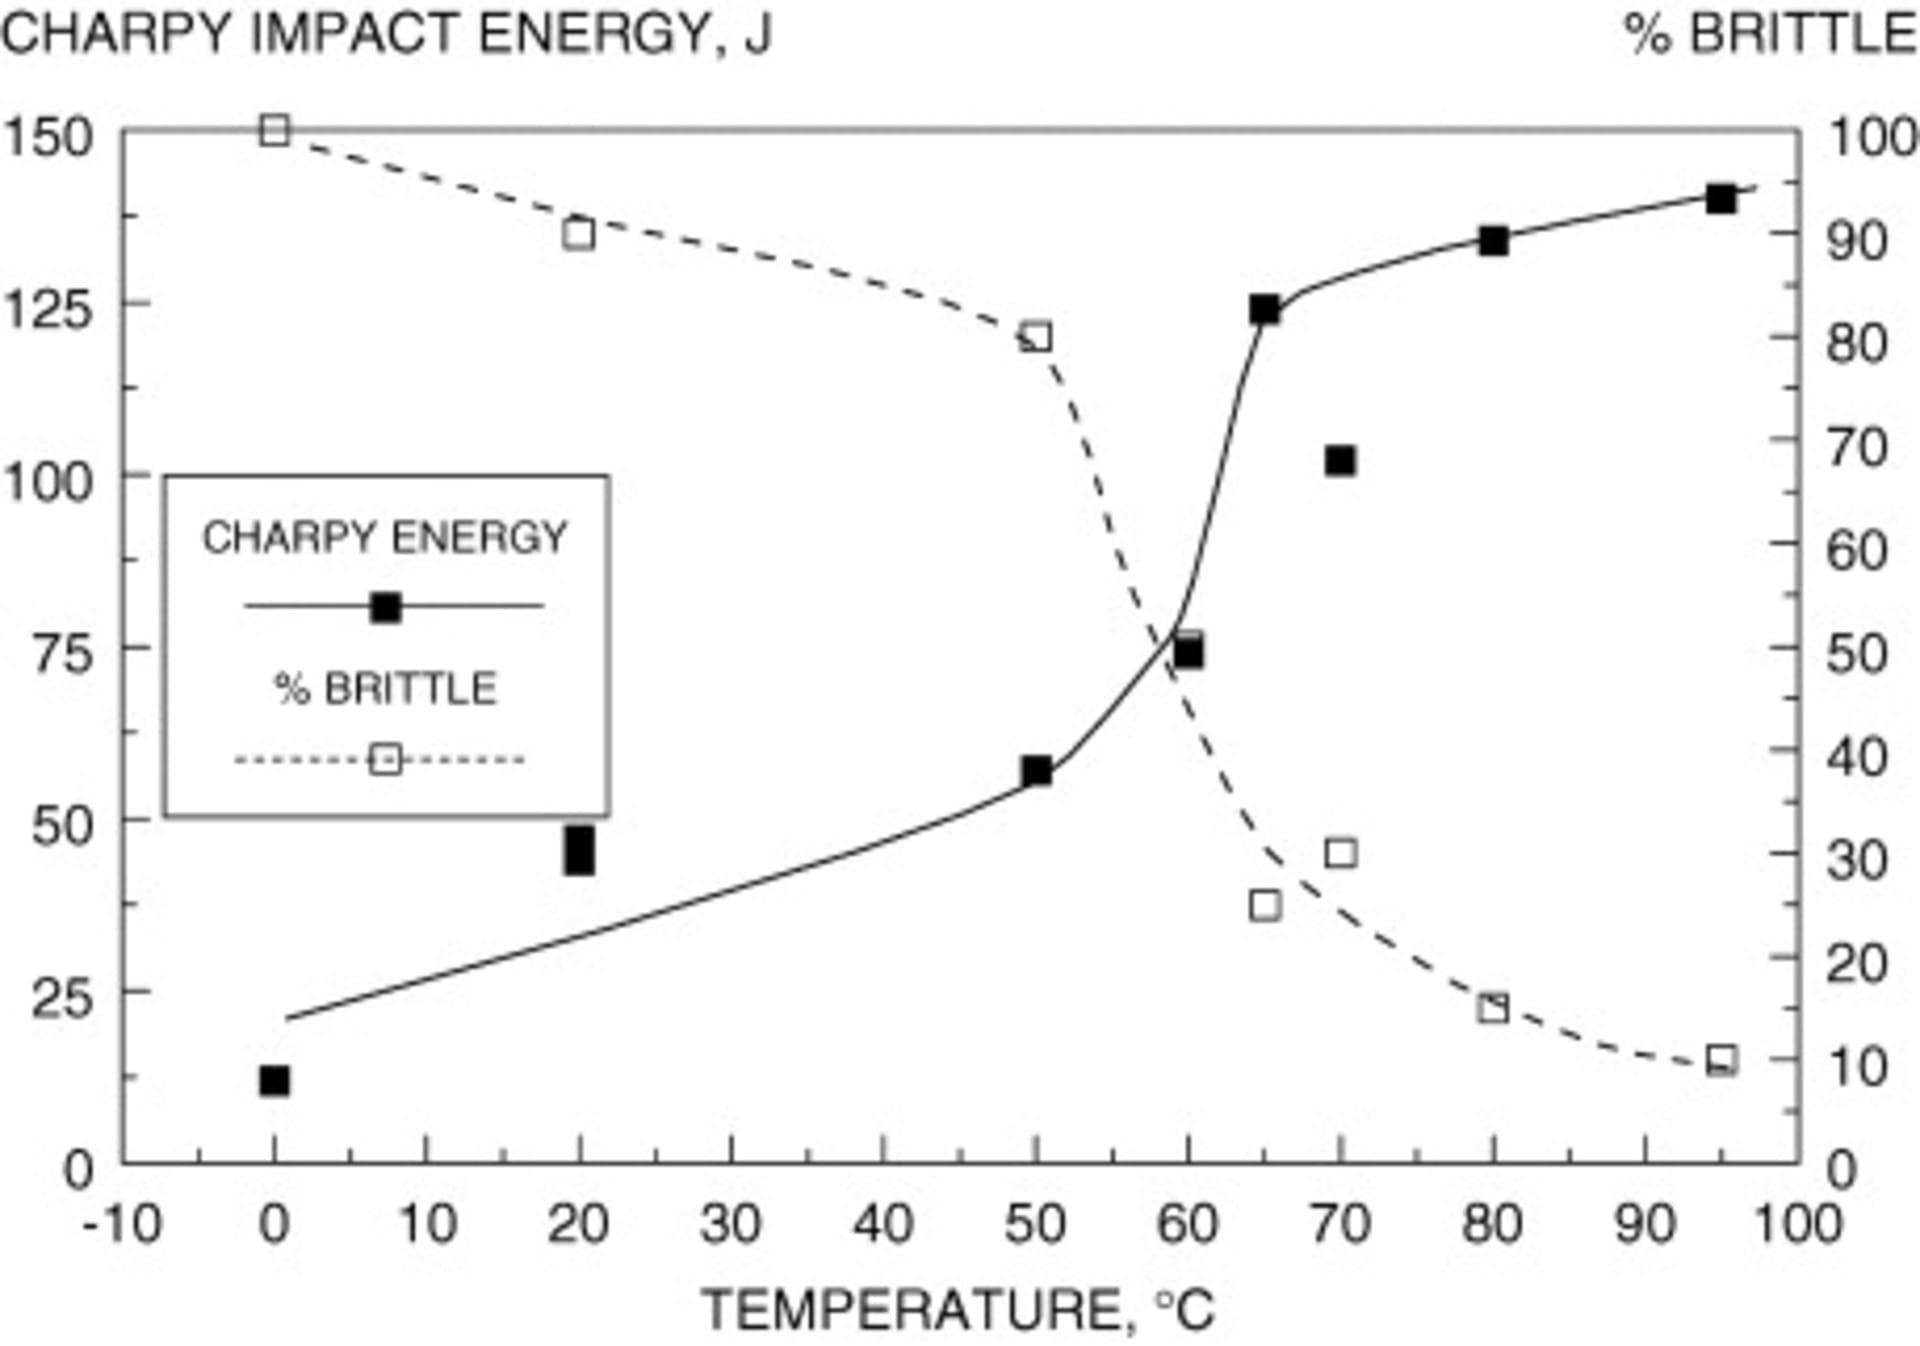
How Temperature Affects Charpy Test Values
Monitoring energy values across a temperature spectrum from brittle to ductile behavior maps the ductile-to-brittle transition temperature curve.
This establishes safe operating design thresholds and control metrics for materials like steel where low temperatures underload fracture resistance.
Effective Test Sample Preparation
Careful sample machining delivers repeatable results. Precision cutting and fine grinding ensures notch dimension compliance and minimizes crack propagation deviations from surface defects. Post-notch stress relief tempering also improves consistency.
Potential Charpy V Notch Errors
Notable control errors altering results:
- Sample dimensions/tolerances
- Notch variations
- Hammer mass
- Bearing friction
- Specimen misalignment
- Test temperature variations
Verifying equipment calibration as well as dimensional QA minimizes deviations.
Key ASTM Standards for Charpy Testing
Various ASTM methodology standards guide Charpy testing for reliable material comparisons:
- A370 Main framework
- E23 allows modified sample sizes
- E2298 repairs fatigue cracks
- E604 statistical interpretations
Charpy Data Analysis and Presentations
Following standardized analysis procedures enables root cause investigations into anomalies compared to expected toughness baselines for alloys and heat treatments:
- Energy values indicate toughness directly
- Fracture surfaces examine material defects
- Impact velocity profiles assess delamination behaviors
Tabulating attributable parameters illuminates failure modes – whether low toughness, embrittlement mechanisms, or impaired cohesion weakening crack resistance.
In conclusion, Charpy v-notch testing efficiently determines ductile fragility levels during quality control or new alloy development – making it a quick standard screen quantifying fracture propagation resistance when facing dynamic impact types of loadings.
Careful control of parameters reveals the mechanisms affecting plastic deformation capacities.


