Concrete expansion joints are an important yet often overlooked component in concrete construction.
This in-depth guide will provide civil engineers, contractors, and anyone working with concrete everything they need to know about concrete expansion joints.
What is a Concrete Expansion Joint?
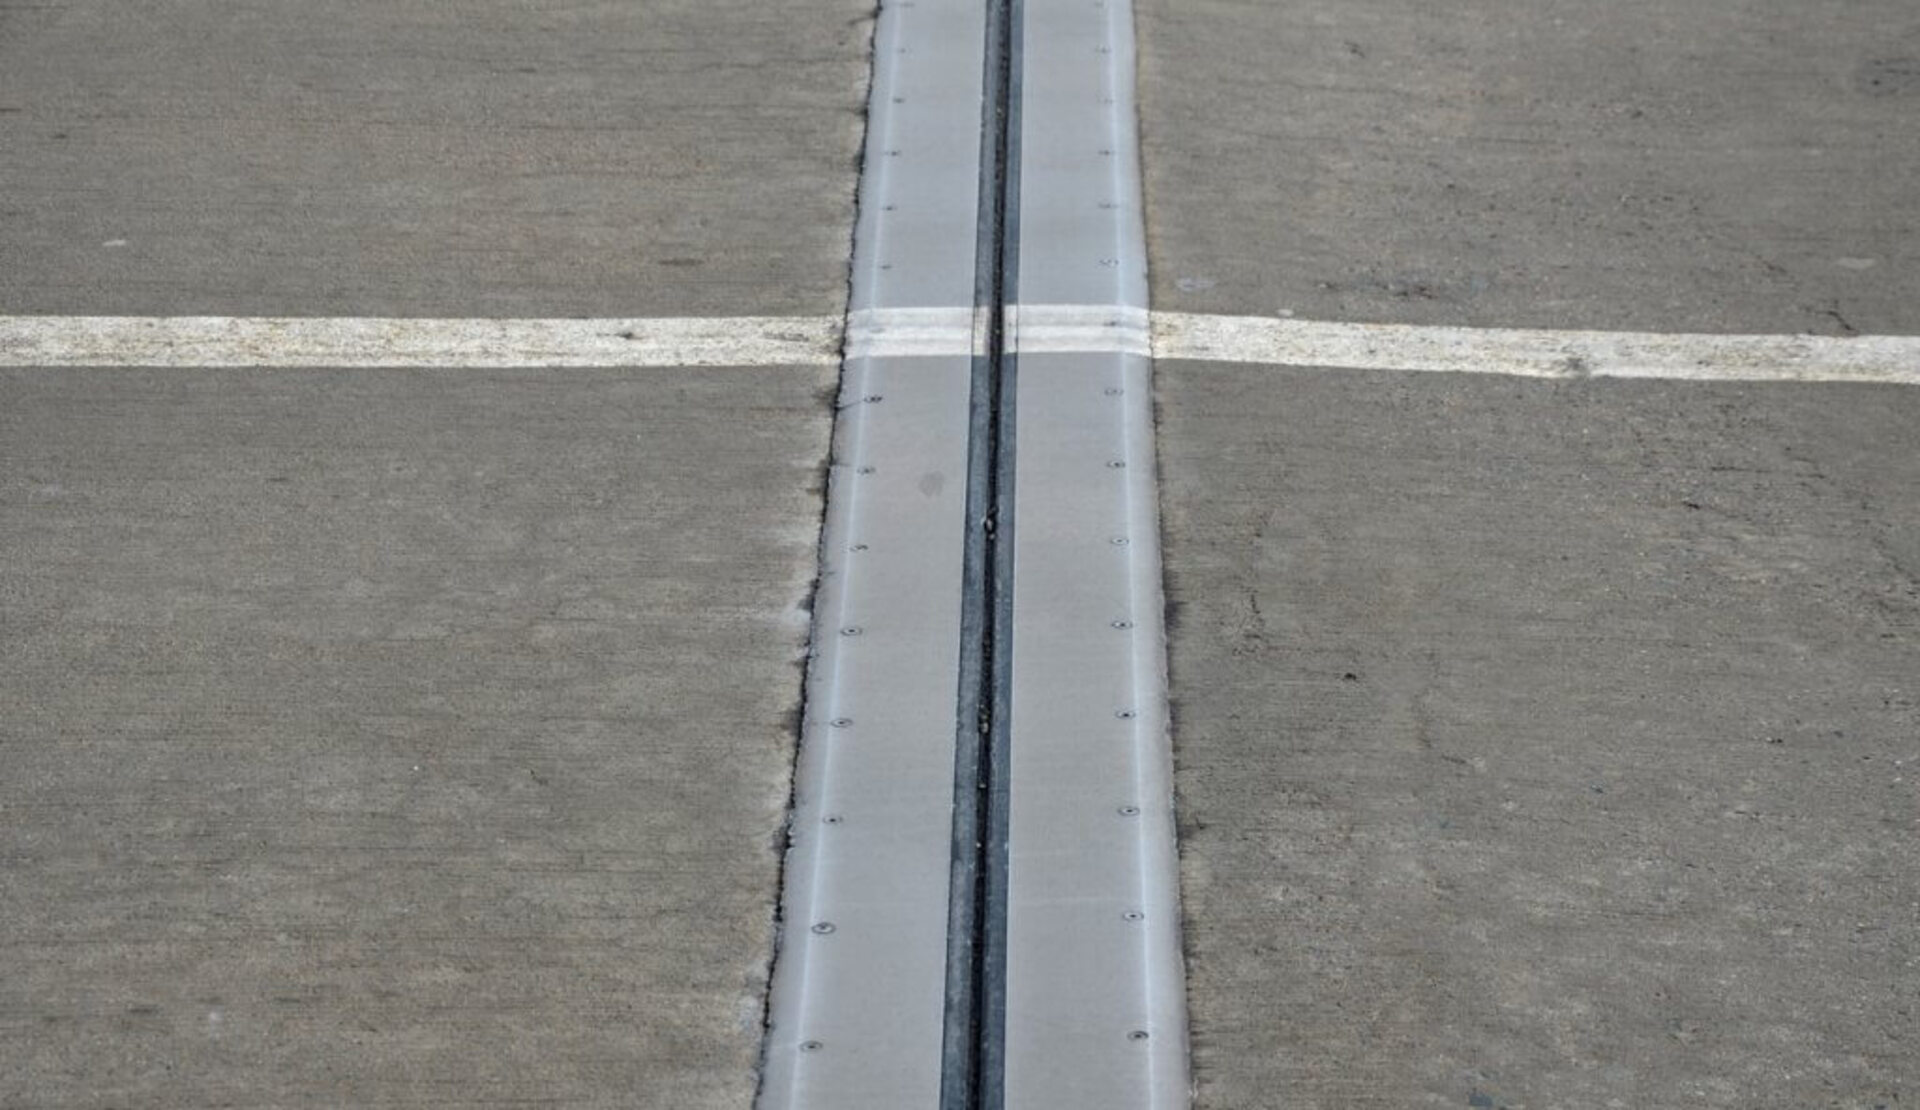
A concrete expansion joint is a planned point of separation between two concrete slabs or structures that allows movement due to thermal expansion and contraction.
They are purposefully placed separations that interrupt the concrete to prevent cracking.
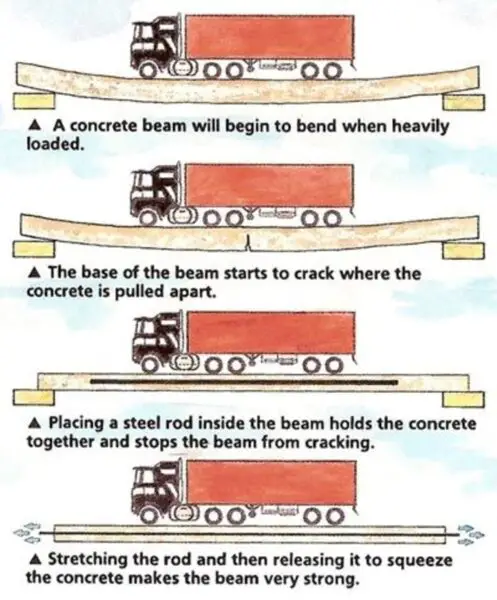
Concrete naturally expands and contracts with changes in temperature. As the temperature rises, the concrete slab expands. As it cools, it contracts. This movement places stress on the concrete that can lead to unsightly cracking without proper precautions. Expansion joints provide space for this movement to occur without damaging the structural integrity of the concrete.
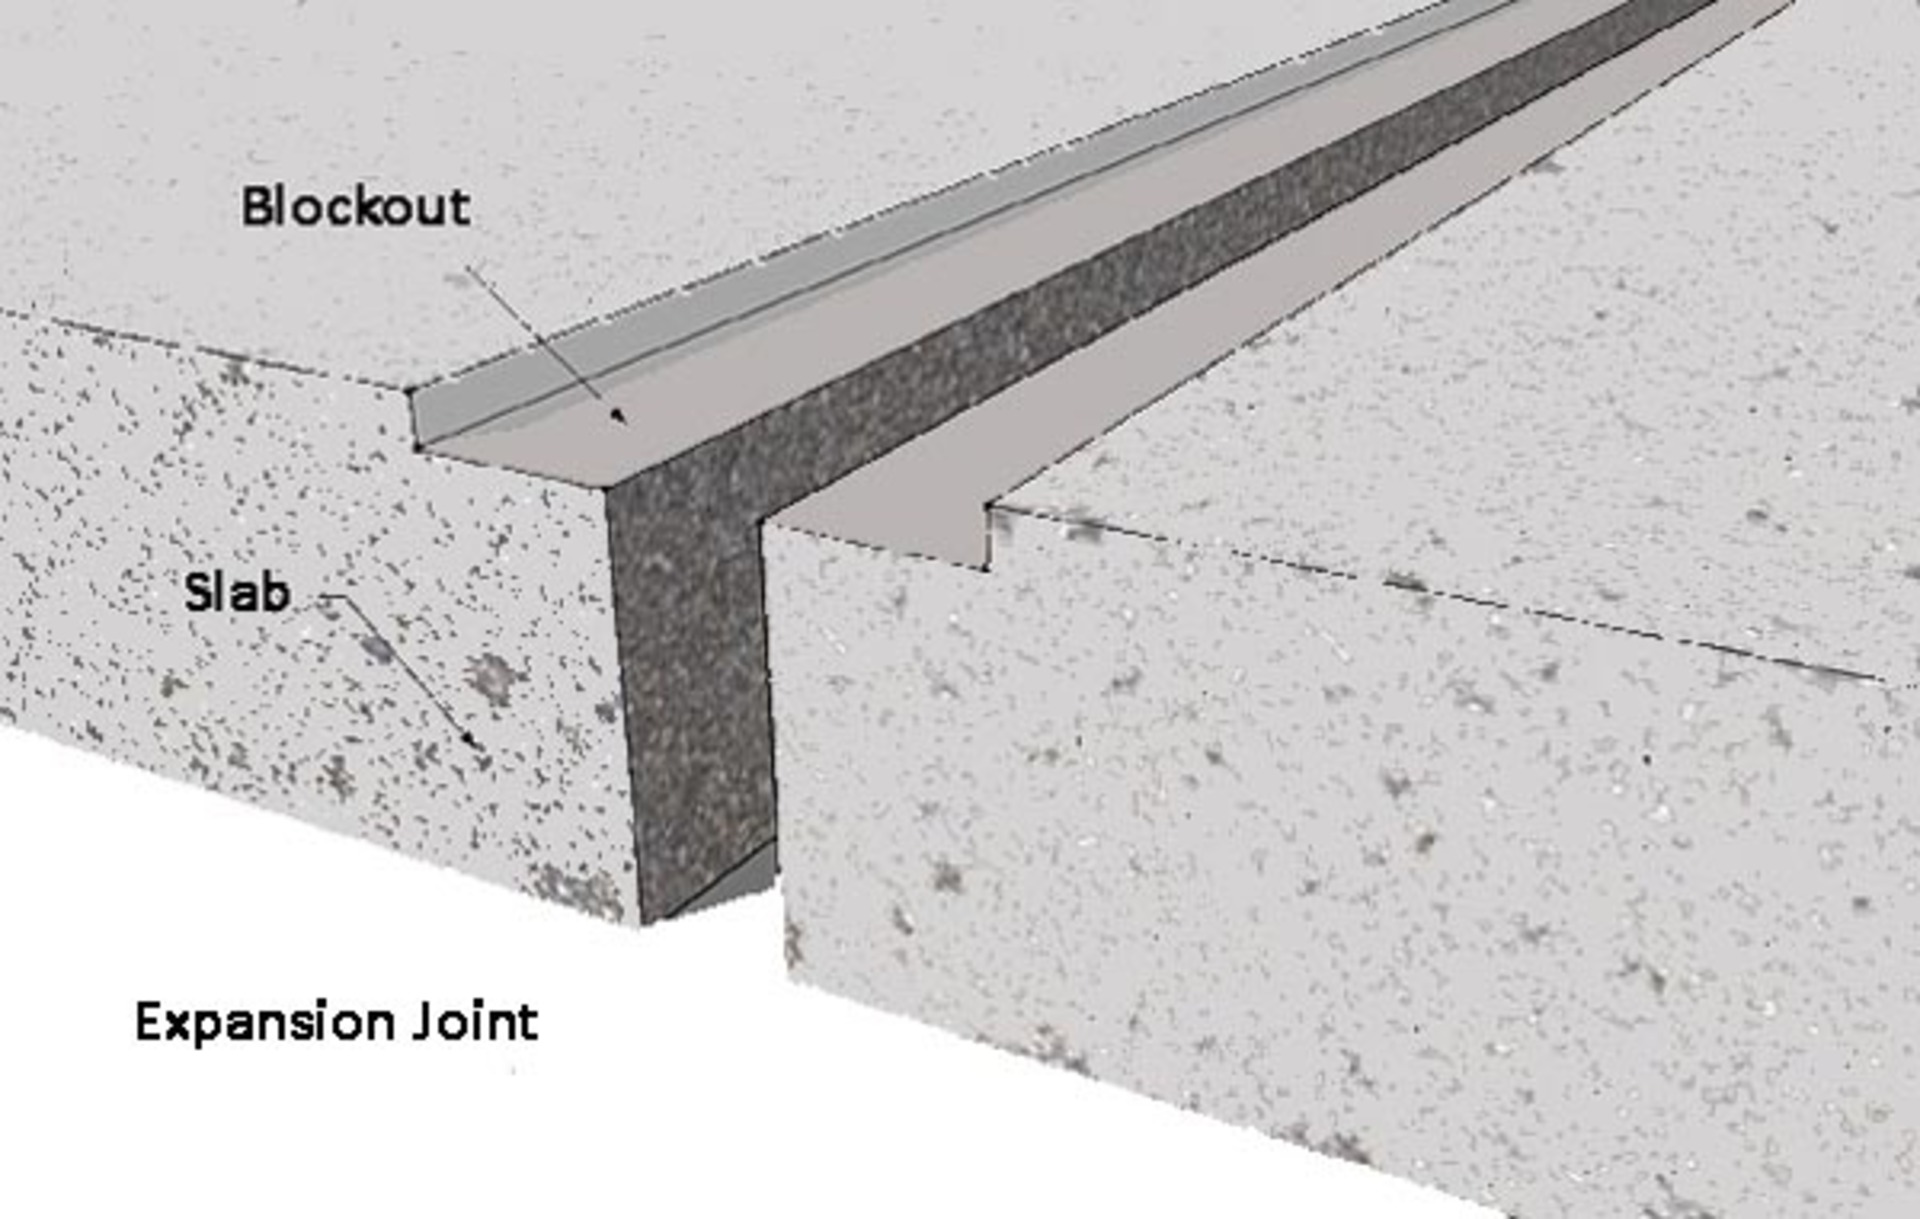
A typical concrete expansion joint consists of a filler material encapsulated by a sealant. The filler creates the separation gap while the sealant protects the joint from intrusion by debris. Expansion joint placement, materials, and installation details are all important considerations when incorporating them into a project.
Why are Concrete Expansion Joints Necessary?
Without concrete expansion joints, concrete slabs would crack extensively from the forces of expansion and contraction. Cracks compromise both the appearance and structural capacity of concrete.
Some key reasons proper expansion joints are crucial include:
- Prevent random cracking – Expansion joints control cracking by providing predetermined zones for the concrete to expand/contract safely. This prevents unsightly and difficult-to-repair random cracking.
- Maintain structural integrity – Uncontrolled cracking can severely diminish the load-carrying capacity of a concrete slab. Properly designed and installed expansion joints preserve strength.
- Accommodate movement – They provide space for the expected movement cycles in the concrete over its service life. This long term flexibility prevents damage.
- Minimize repairs – Replacing damaged, curled, or cracked slabs is far more expensive and time consuming than installing the right expansion joint.
Overall, the nominal upfront cost of creating expansion joints is dwarfed by the headaches, risks, and costs associated with neglecting their necessity in concrete work.
When Should Concrete Expansion Joints Be Used?
Any concrete subject to thermal variations or movement should be designed with appropriate expansion joints. As a rule of thumb, expansion joints should be used:
- In slabs subjected to seasonal temperature changes
- At regular intervals in long run slabs, typically every 30 feet
- Wherever concrete abuts another structure like a building, column, or light pole
- Wherever there is a change of thickness in the slab
- Wherever slabs with existing expansion joints are being extended or added onto
Following these guidelines helps satisfy design code requirements while mitigating unsightly random cracks. Consulting with an experienced concrete contractor is also recommended when planning appropriate expansion joint usage on a project.
Types of Concrete Expansion Joints
There are several standard types of joints used to accommodate movement in concrete slabs. Common expansion joint applications include:
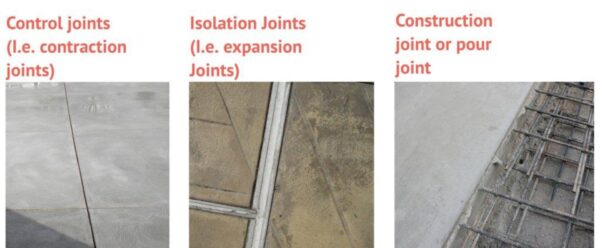
Isolation Joints
These joints completely separate adjacent concrete slabs, allowing them to move independently. They are typically placed where slabs meet other structures like buildings, columns, or poles.
They are commonly placed where:
- Slabs abut foundations, columns, or light poles
- Sidewalks meet buildings
- Driveways adjoin garage slabs
Isolation joints typically use 1” wide joint filler material. Premolded expansion joint filler, elastomeric sealants, or compressible foam products are commonly used.
Control Joints
Control joints are partial depth cuts made in concrete to create internal expansion zones. They help control the location of cracking within the slab by allowing movement across the joint. Control joints typically:
- Extend 1⁄4 the slab depth
- Arespaced every 10-15 feet in each direction
- Often use silicone or polyurethane sealants
Proper layout of control joints requires expertise, as poorly placed joints can actually compound cracking issues if not done correctly.
Construction Joints
Whenever new concrete is placed against existing cured concrete, the joint where they meet is designated a construction joint. These joints allow shrinkage movement between previously set concrete and newly placed wet concrete.
Construction joints often incorporate keys, dowels, or tie bars to mechanically link the sections together across the joint. Sealant or expansion filler materials help cushion movement within the joint.
Concrete Expansion Joint Sealant Options
The sealant applied over top of the filler material plays a critical role by preventing the intrusion of incompressibles like gravel, dirt, and debris into the joint space. If hard materials enter the joint, they can prevent proper expansion/contraction movement. This bottling up of forces is a common cause of joint failure.
There are several types of flexible sealants to consider:
- Polyurethane offers excellent flexibility and durability at a low cost. It adheres well if applied properly and is easy to tool into any shape.
- Silicone provides maximum flexibility and resistance to extreme temperatures. It offers excellent longevity but requires meticulous joint preparation for proper adhesion. Silicone’s high cost is its primary downside.
- Polysulfides feature great flexibility, weather-ability, and chemical resistance. They also withstand high movement capacities. Brittleness over time is this material’s main limitation.
- Asphalt-reinforced rubberized asphalt (ARA) provides good flexibility at low cost but has limited UV/chemical resistance. ARA works well in certain applications despite its drawbacks.
No single sealant fits every project. Consider all installation factors, expected movement, and the service environment when selecting an appropriate flexible sealant for the application.
Concrete Expansion Joint Design Details
Careful attention during design and construction ensures expansion joints meet long-term performance expectations. Here are key installation best practices:
- Joints should be designed into a project’s structural drawings prior to any concrete being placed
- Joint filler material must match the desired width and movement capacity required
- The filler depth should run from the bottom up to approximately 3⁄4” below the finished surface
- Filler pieces should be interlocked or bonded end-to-end for continuity within a joint run
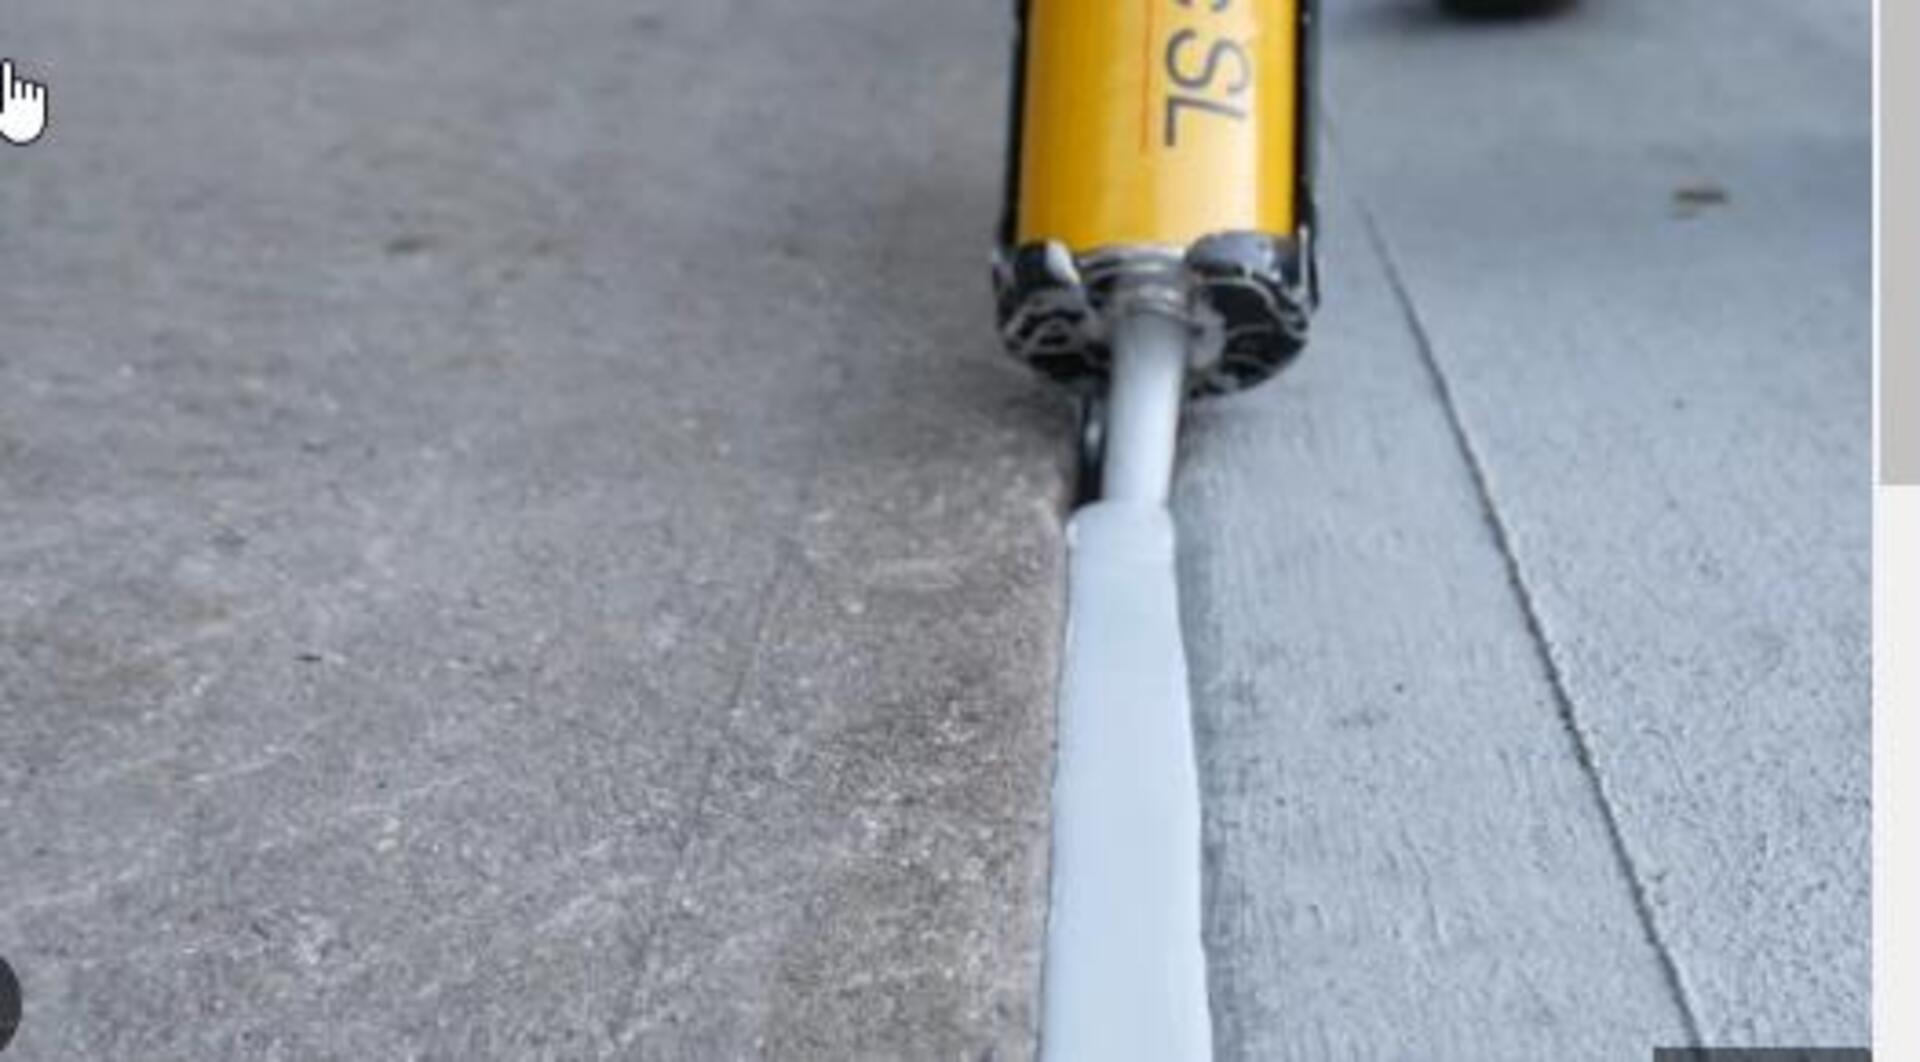
- Sealants require thorough surface prep and usually backer rods to avoid three-sided adhesion
- Sealants should be tooled into the joint cavity to maximize contact after application
No shortcuts should be taken on joint preparation and installation steps for maximum durability. Taking the time to interface with suppliers to obtain product details can help simplify future steps.
Where to Place Concrete Expansion Joints
Joint placement is a strategic decision based on the expected movement and modes of expansion/contraction that will occur. While not exhaustive, common expansion joint locations include:
Perimeter Joints
Perimeter joints surround isolated slabs on all sides. This releases the demands of interconnected slabs on the isolated slab and foundation.
Transition Joints
Wherever thicker slabs transition to thinner adjoining slabs, a transition joint allows the differential movement.
Penetration Joints
Slabs pierced by columns, equipment pads, light poles, or other objects warrant isolation joints at each penetration.
Extension Joints
These joints occur at the interface where new slabs connect to existing slabs. Changes in cure times and movement potential make extension joints critical.
Layout Guidelines
Rule-of-thumb spacing guidelines for typical control joint layouts include:
- Joint spacing no greater than 2.5 times slab thickness
- Spacing between 15 to 20 feet for sidewalks
- Control joints in slabs every 10 to 15 feet
Consult local codes and best practices for specific project specifications. Careful expansion joint planning minimizes unsightly surface effects.
Choosing Filler Materials
The gap created by an expansion joint runs the risk of loose gravel/debris entering from above. Incompressibles within the joint prevent designed movement and lead to failure.
The proper joint filler prevents this issue while supporting expected structural movement cycles over the slab lifespan.
Common joint filler options include:
Premolded Fiber Expansion Joint Filler
- Very cost effective
- Made of recycled fibers bound with asphalt
- Works for typical 1” sidewalk/slab joints
- Available in rolls or precut strips
Elastomeric Foam Joint Fillers
- Flexible polyurethane or latex rubber foams
- Used for both horizontal and vertical applications
- Can compress down to 25% and expand to over 150% of thickness
- More expensive but withstand substantial movement
Compressible Foam Joint Fillers
- Typically closed-cell foams like polystyrene or polyethylene
- Economical option for horizontal slab joints
- Difficult to use on steep vertical surfaces
- Easy to install and replace if needed
Consult manufacturer specs to match material properties, thickness, and permissible movement to project needs.
Key Considerations for Joint Placement
well-designed joints consist of appropriately spaced concrete separations at slab intersections, penetrations, layout grids, and structural transitions.
Best practices when laying out control and construction joint placement:
- Place joints over existing panel/pour joints where new concrete interfaces existing slabs
- Orient control joints to follow lines between rebar grids instead of through them
- Ensure planned joints structurally dovetail into adjacent slabs
- Extend isolation joints fully through slabs rather than just control depth
While joints layouts follow general rule-of-thumb spacing guidelines, critical evaluation of connecting structural elements ensures durability.
What is the Cost to Replace Expansion Joints?
As with all building components, expansion joints require periodic replacement depending on the sealant/filler products initially installed. Typical sealant materials last 10-15 years before requiring replacement.
Joint repair costs vary based on:
Accessibility – Driveways, slab-on-grade floors, and low elevation locations prove far cheaper to access and replace vs. high vertical applications. Equipment lifts for elevated joints add considerably to bottom line pricing.
Contamination – FAILED or clogged joints filled with compacted debris require cleaning out prior to installing replacements. This unexpected time and labor drives overall costs upward.
Special ordering – Matching custom size or type joint materials vs standardized available supplies effects timelines more than job costs.
Typical total costs to replace failed expansion joints run between $25 – $45 per linear foot installed. Simple, accessible horizontal joints on the low end, while difficult high elevation vertical applications hit the upper pricing thresholds.
Repairing Damaged Concrete Expansion Joints
Expansion joint failure occurs when excessive seasonal movement stress demolishes the filler material and sealants. The destruction of these components leads to uncontrolled cracking.
Repairing failed expansion joints involves:
- Removing all debris and old filler material from within the slab separations down to clean concrete on both sides
- Sandblasting joint walls to roughen surfaces and remove contaminants
- Ensuring repaired cavities meet proper sizing recommendations for new fillers
- Installing backer materials prior to applying flexible sealants
- Filling joints with appropriate compressible filler products sized 0.5” below finished grade
- Applying flexible polyurethane or silicone sealant overtop per manufacturer specifications
- Tooling sealants profile to maximize adhesion in the joint cavity
Proper repairs restore joint functionality crucial to preventing further concrete damage. Delaying maintenance leads to more costly slab repairs down the road.
Key Takeaways
The need for properly designed and constructed expansion joints is often overlooked on smaller residential flatwork and even commercial projects.
However, neglecting this key component often leads to extensive damage expense and headaches down the road.
A proactive approach considers likely slab movement magnitudes, cyclical frequencies, interconnected structural elements, and joint filler/sealant lifespans from the beginning.
With mindful design considerations, proper material selection for the application, and careful workmanship installing components, high performing concrete expansion joints stand the test of time.
They are an insurance policy protecting concrete integrity and longevity across temperature fluctuations and adjacent structure interfaces.
Conclusion
Concrete cracking and movement issues often come down to overlooked expansion joint considerations.
Keeping key joint design protocols, quality construction practices, optimal filler products, and durable sealants in mind throughout a project minimizes later repairs.
What small upfront expense or effort is required when planning appropriate expansion joints far outweighs the alternative – widened cracks, lifted edges, and needed slab replacements.
Concrete longevity and performance depend heavily on the flexibility and integrity of planned control separations with the thermal cycles, seasonal moisture shifts, and adjacent constructions any slab encounters over decades of service.


