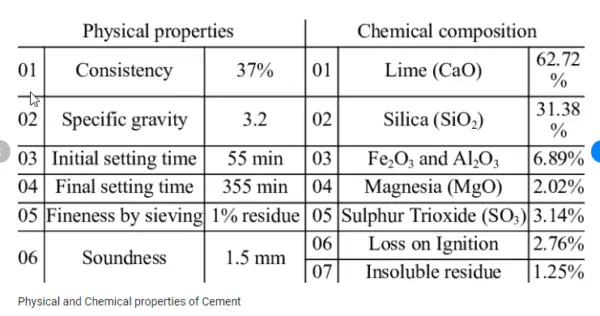
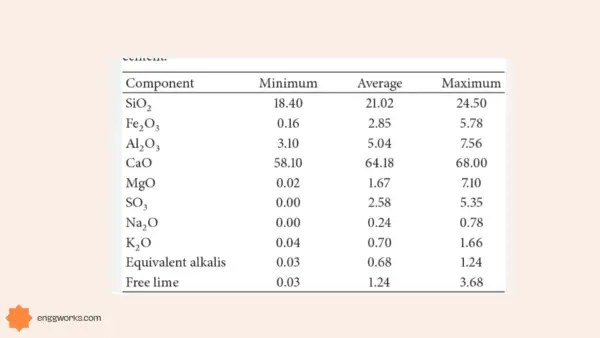
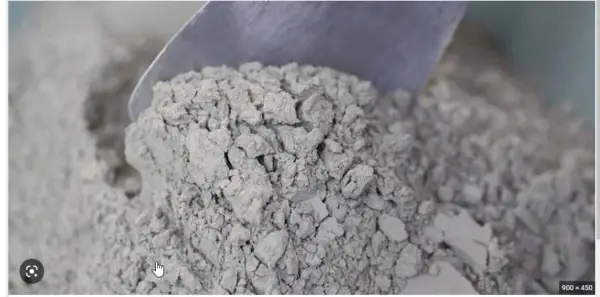
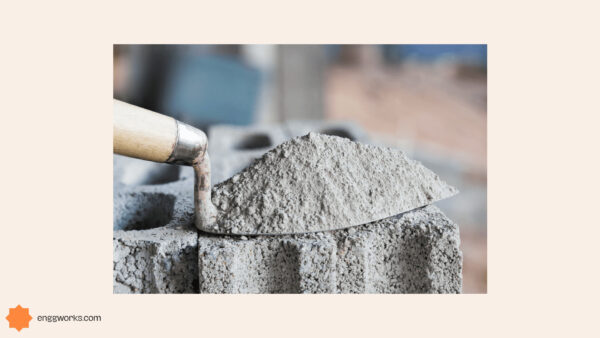
Cement laboratory tests are crucial to guarantee the product’s quality and effectiveness in a range of applications. The chemical composition, fineness, specific gravity, consistency, setting time, soundness, strength, heat of hydration, and other elements are the properties of cement and also affect the qualities of cement.
Common Laboratory Tests on Cement
- Chemical Analysis
- Fineness test
- Consistency test
- Setting time of cement
- Soundness test
- Strength test
- Tensile Strength test
- Heat of hydration
- Specific gravity test
Chemical Analysis
Cement’s strength, durability, setting time, hydration heat, and resistance to chemical attacks are all impacted by its chemical composition.
Consequently, before utilizing cement in any project, it is crucial to do a laboratory test to determine its chemical composition.
The chemical composition of cement can be tested using a variety of techniques and guidelines.
X-ray fluorescence (XRF) analysis, which measures the elemental composition of cement using X-rays, is one of the most popular techniques. For major and minor elements including calcium, silicon, aluminium, iron, magnesium, sulphur, and others, XRF analysis can deliver precise and quick results.
Following are the chemical requirements of ordinary cement:
- Ratio of percentage of alumina to that of iron oxide
This ratio should not be less than 0.66
- Ratio of percentage of lime to those of alumina, iron oxide and silica
This ratio should not be less than 0.66 and it should not be greater than 1.02
- Total loss on ignition
This should not be greater than 4 percent
- Total sulphur content
Sulphur content is calculated as SO3 and it should not be calculated be greater than 2.75 percent
- Weight of insoluble residue
This should not be greater than 1.5 percent
- Weight of magnesia
This should not exceed 5 percent
Fineness test
A laboratory test called the fineness test is used to measure the cement’s particle size dispersion.
- Fineness of cement is an important property that affects the cement’s workability, setting time, and strength can all be impacted by the particle size.
- There are three methods such as sieve or an air permeability device, the Wagner turbidimeter method are used for the fineness test.
- The last two methods are used to measure the surface area whereas the first method measures the grain size.
However, the first two methods are widely used to determine the fineness of cement.
Sieve Method
- In this method cement weighing 100 gm is passed through a 90 micron IS sieve continuously sieved for 15 min in a circular and vertical motion.
- The residue is then weighed and it should not exceed 10 percent of original weight.

Air permeability Method
- The air permeability method involves forcing air at a predetermined pressure through a sample of cement that has been placed in a permeability cell.
- The specific surface area of the cement, a measure of its fineness, is calculated using the rate of air flow.
- The percentage of cement particles that pass through a particular sieve size or the precise surface area of the cement in square metres per kilogramme are two common ways that the results of a fineness test are presented.

Consistency Test
- The strength, durability, setting time, and workability of cement are all influenced by its consistency.
- Segregation, bleeding, and water loss may result from cement that is overly pliable.
- Mixing, placing, and compacting cement that is too stiff could be challenging.
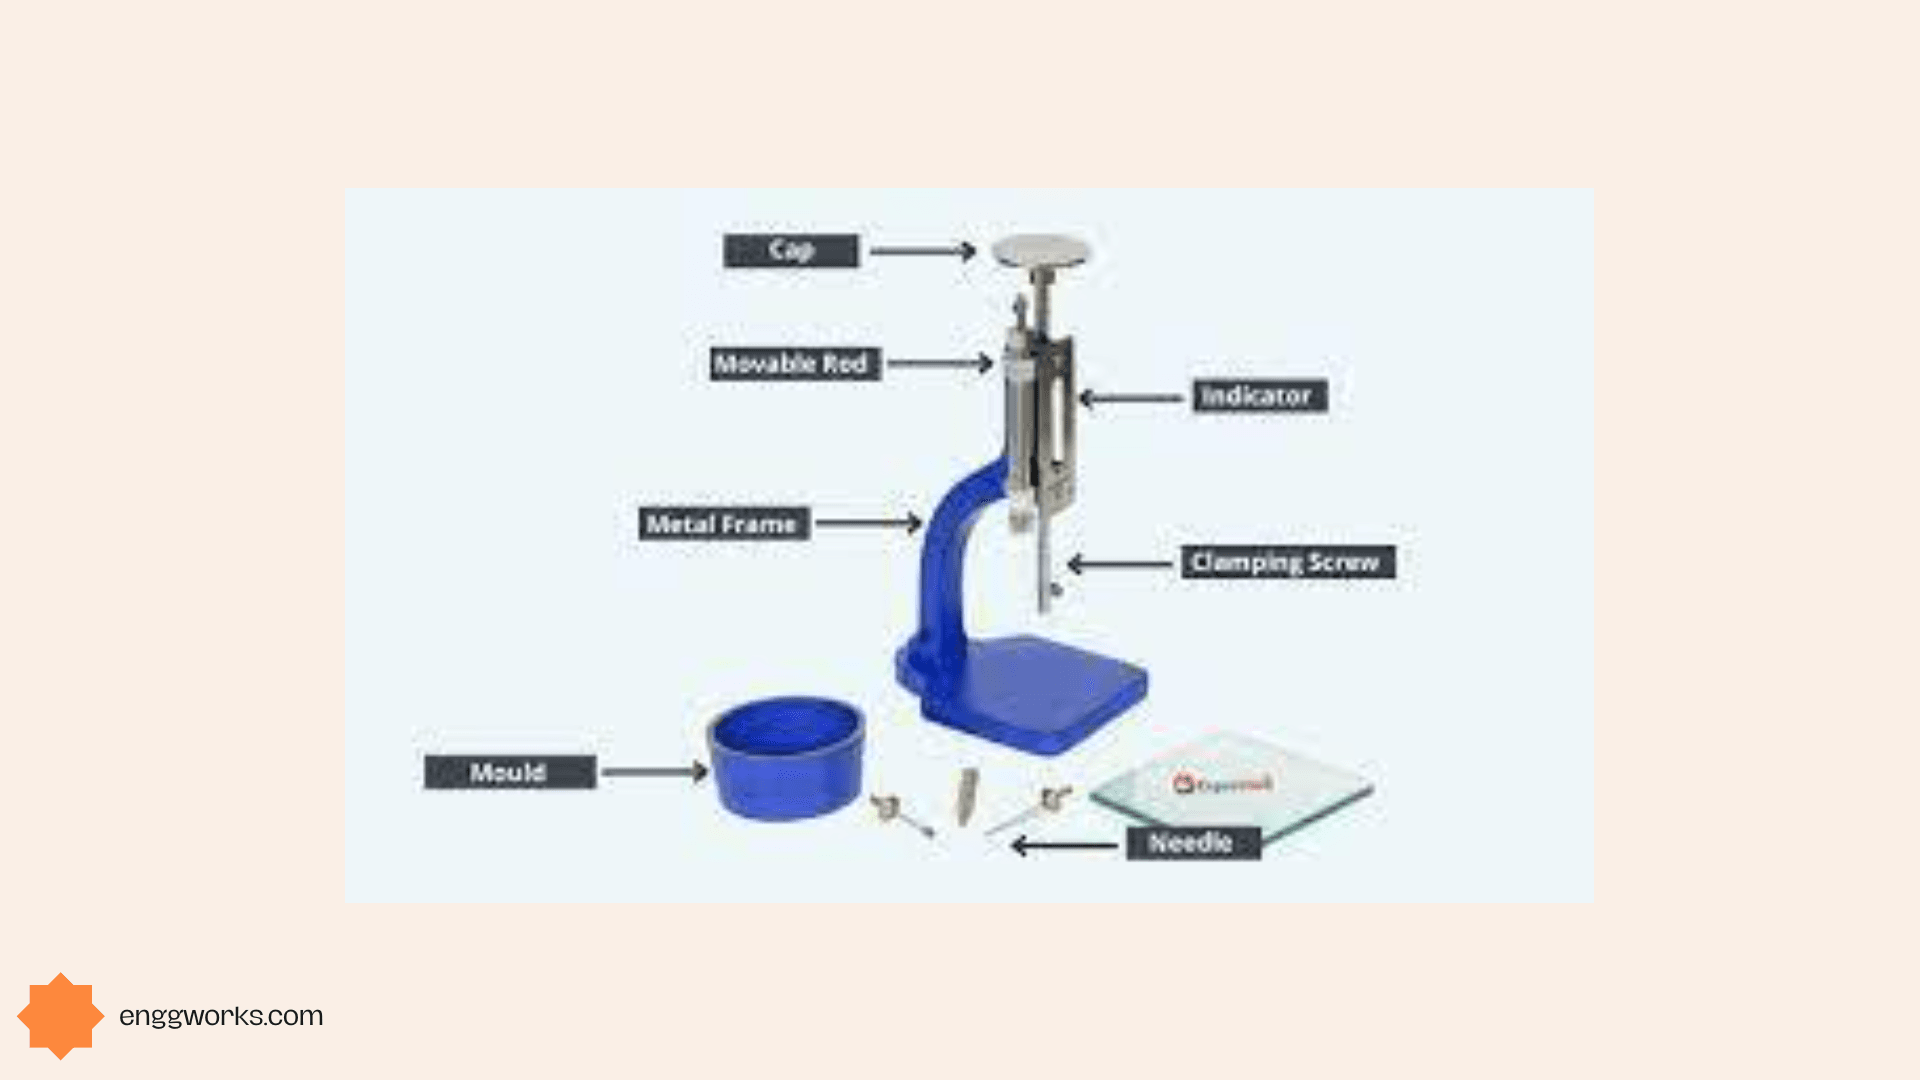
The Vicat test is one of the widely used techniques for evaluating cement consistency. Following are the steps to be followed while conducting the test.
- A Vicat apparatus, which consists of a metal mould, a plunger, a needle, and a scale, is used for this test.
- A known quantity of cement and a specific proportion of water are mixed for the test, and the resulting paste is then poured into the mould.
- The depth of penetration is then calculated once the plunger or needle is lowered into the paste’s surface.
- The plunger must extend 33 to 35 mm from the mould’s base to get the standard consistency of any cement.
- This indicates that the cement has just the right amount of water to make it usable without being excessively waterlogged.
- Depending on the type and quality of cement, a different amount of water may be needed to attain this consistency. Normally, it ranges from 24% to 36% by weight of cement.
Setting time of cement
- The setting time of cement impacts the workability, strength and durability of concrete.
- According to ASTM C191, a device known as the Vicat apparatus is used to determine the cement’s setting time.
- Mix 650 g of cement with 0.85 times the amount of water necessary to make a paste with a standard consistency to make cement paste.
- Pour the cement paste into Vicat mould and allow it to set.
- Quickly release the needle after slowly lowering it until it meets the paste’s surface.
- Until the needle is unable to leave an impression on the surface, repeat this technique every 2 minutes and this will be the initial setting time
- Replace the needle with circular attachment and repeat the same procedure
Initial setting time
The initial setting time is defined as the time when the needle fails to make an impression on the surface of the paste.
Final Setting time
The final setting time is defined as the time when the needle does not sink more than 0.5 mm into the paste.
Soundness Test
One of the crucial properties of cement is soundness. It refers to cement’s capacity to keep its volume after hardening. Cement that is sound ensures that the concrete it produces doesn’t experience significant volume variations during setting and hardening.
Soundness of cement can be determined by two methods namely Le Chatelier method and autoclave method.
Le Chatelier method
With this procedure, a small brass mould with a split cylinder and two indications is the equipment needed. The steps are as follows:
- Fill the mould with a cement paste that has been prepared and is of a standard consistency.
- Submerge the mould for 24 hours in water that is 27°C.
- Take an initial reading by measuring the space between the markers.
- Boil the mould for 30 minutes, then remove it from the water and let it cool.
- Take another measurement of the space between the indicators and note it as the final reading.
- The difference between the final and first values should be calculated. Here is the cement paste expanding.
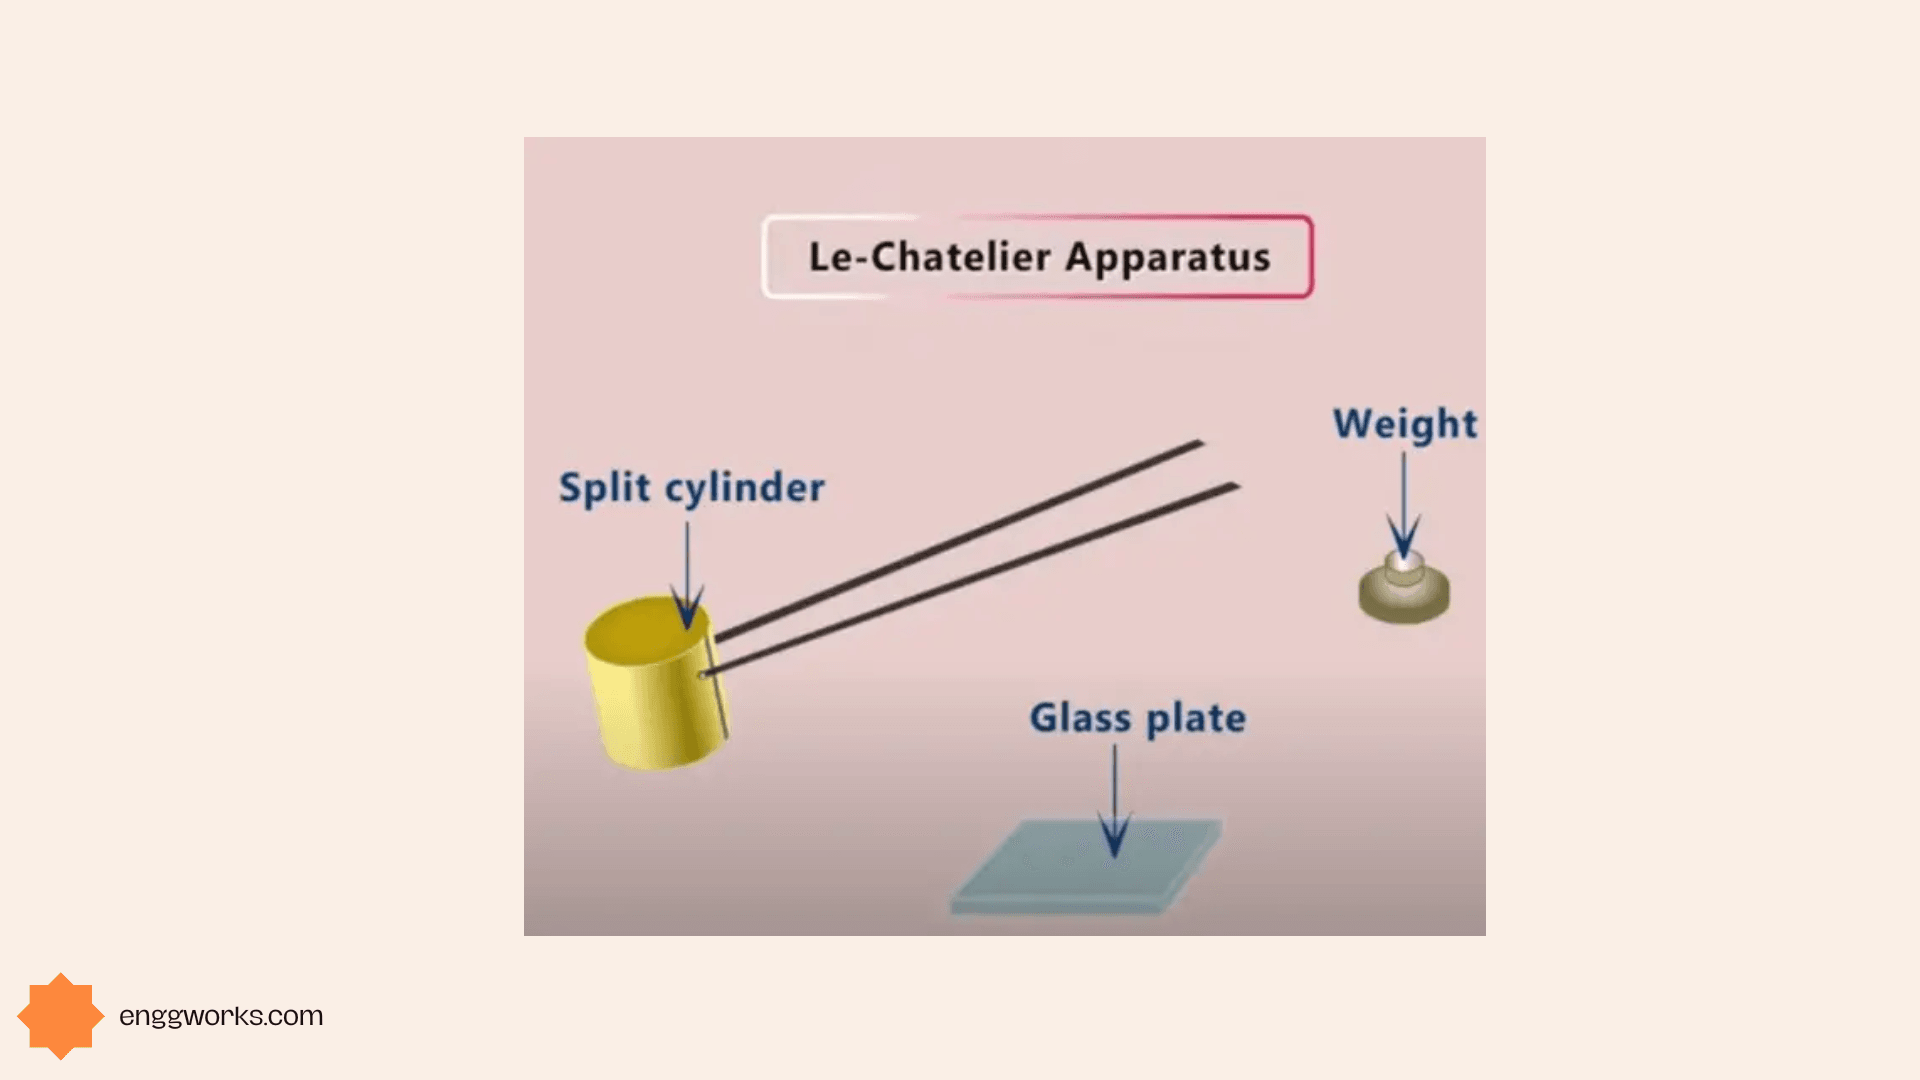
For Ordinary Portland cement and Rapid hardening Portland cement, the expansion should not be greater than 10 mm and 5 mm, respectively.
Autoclave Method
A steel mould with a gauge length of 25 cm and a cross-sectional area of 25 cm2 serves as the equipment for this approach. The steps are as follows:
- Fill the mould with a cement mortar that has been prepared using the industry-standard sand-to-cement ratio of 1:3.
- Keep the mould at 27°C in a wet environment for 24 hours.
- Calculate the specimen’s length and note it as the starting length.
- Put the mould in an autoclave and set the temperature and pressure to 215°C for 3 hours.
- Cool the mould after removing it from the autoclave.
- Reassess the specimen’s length and note the new measurement as the final length.
- Determine the length change as a percentage. This is the cement mortar expanding.

For Ordinary Portland cement and Rapid hardening Portland cement, the expansion should not be greater than 0.8% and 0.4%, respectively.
Strength Test
The durability and stability of the structures made with cement are dependent on its strength, making it an essential component of that material’s quality.
The following steps are involved in the cement strength test:
- Mix a small amount of cement with water to create a paste.
- After pouring the paste into a mould in the shape of a cube, give it 24 hours to harden.
- Remove the cube from the mould after 24 hours, and then leave it in a curing tank for 7 or 28 days.
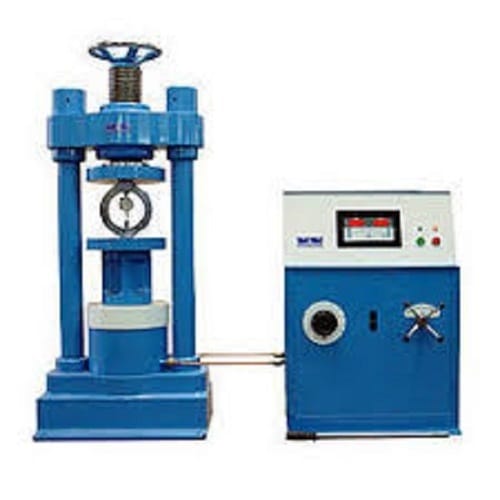
- Place the cube on a compression testing machine after the curing period, then gradually add a load until it breaks.
- Calculate the cement’s compressive strength by noting the highest load that could be applied before the cube broke.
Tensile strength test
A critical component that affects cement’s durability and stability is its tensile strength.
The following steps are included in the cement tensile strength test:
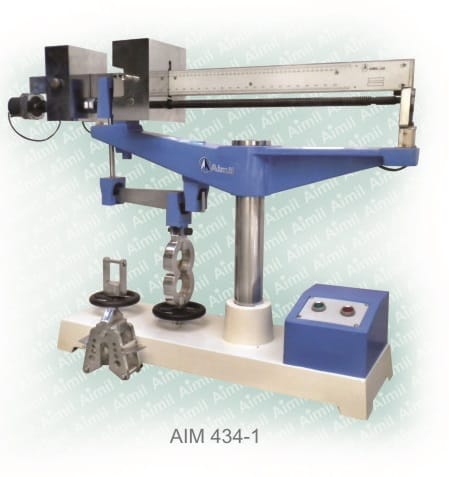
- Using a typical mix percentage, create a sample of cement and water in the form of a briquette.
- Cure the sample for 24 hours in water with a relative humidity of no less than 90% at a temperature of 27.2°C.
- The sample should be taken out of the water and given some time to dry.
- Put the sample on the tensile testing apparatus, then gradually apply pressure until the sample breaks.
- Calculate the cement’s tensile strength by noting the maximum load that could be applied without the sample breaking.
Heat of hydration
It is a crucial factor in determining the performance and quality of cement as well as the rise in temperature and thermal stress in concrete constructions.
A common laboratory test for cement is mixing a given amount of cement with a known amount of water at a specific temperature and monitoring the temperature change over time.
Several techniques, including isothermal calorimetry, semi-adiabatic calorimetry, and solution calorimetry, can be used to conduct the test. One of the method is given below:
Isothermal Calorimetry
- The cement-water combination is placed in a sealed container and submerged in a constant-temperature water bath as part of the isothermal calorimetry method.
- A sensitive thermometer is used to gauge the heat produced by the hydration reaction as it is transported to the water bath.
- Calculating the heat of hydration involves dividing the whole amount of heat emitted by the mass of cement.

Specific gravity test
It is a significant factor that affects the performance and quality of concrete.

- A Le Chatelier flask is a straightforward instrument that can be used to determine the specific gravity of cement.
- A glass bottle with a small neck and two marks on it is known as a Le Chatelier flask.
- The lower mark denotes a 250 ml volume, whereas the upper mark denotes a 500 ml volume.
- Kerosene or xylene, which are liquids that do not react with cement, are added to the flask until the lower mark is reached.
- The flask is then filled with a known mass of cement (typically 50 g), and any air bubbles are removed by vigorously shaking it.
- The displacement of the cement particles raises the liquid’s level. The amount of cement is determined by the difference between the liquid level’s initial and final readings.
- According to IS requirements, cement should have a specific gravity of between 3.1 and 3.6.
- A low specific gravity means that the cement has too much air or moisture in it, which weakens and shortens the cement’s strength and durability.
- A high specific gravity suggests that the cement is adulterated or includes impurities, which detract from its quality and uniformity.

